Wednesday, September 26, 2012

Like the late night DJ, I am taking your requests

I couldn't turn down a couple of requests from friends.  

First up, a newborn baby girl football set.     

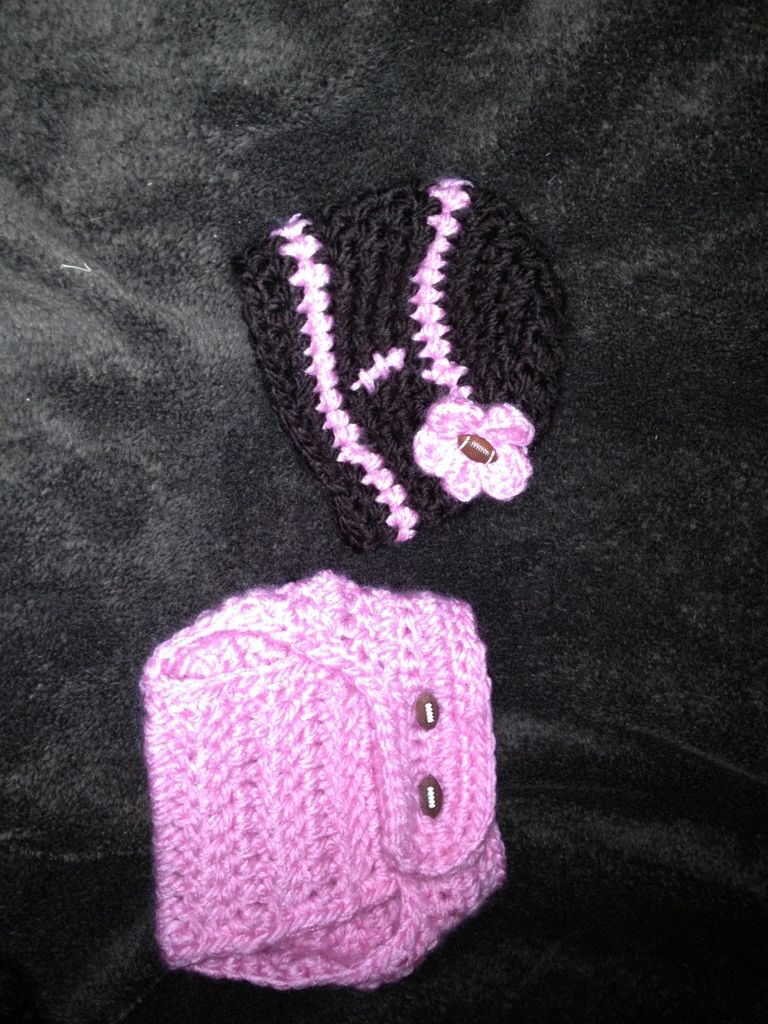
Dontcha just love the football buttons?


I am not sure about the leg warmers, wish I had a doll or baby to try them on.  But the pics I have seen on etsy of babies in hats and diaper covers and leg warmers are cute.  See?  And another!  OK, this one is a bit scary.   Plus, I needed something simple to work on in the car on the way to Florida, so there you have it.  Leg warmers. They go well with the ruffle butt, I think.


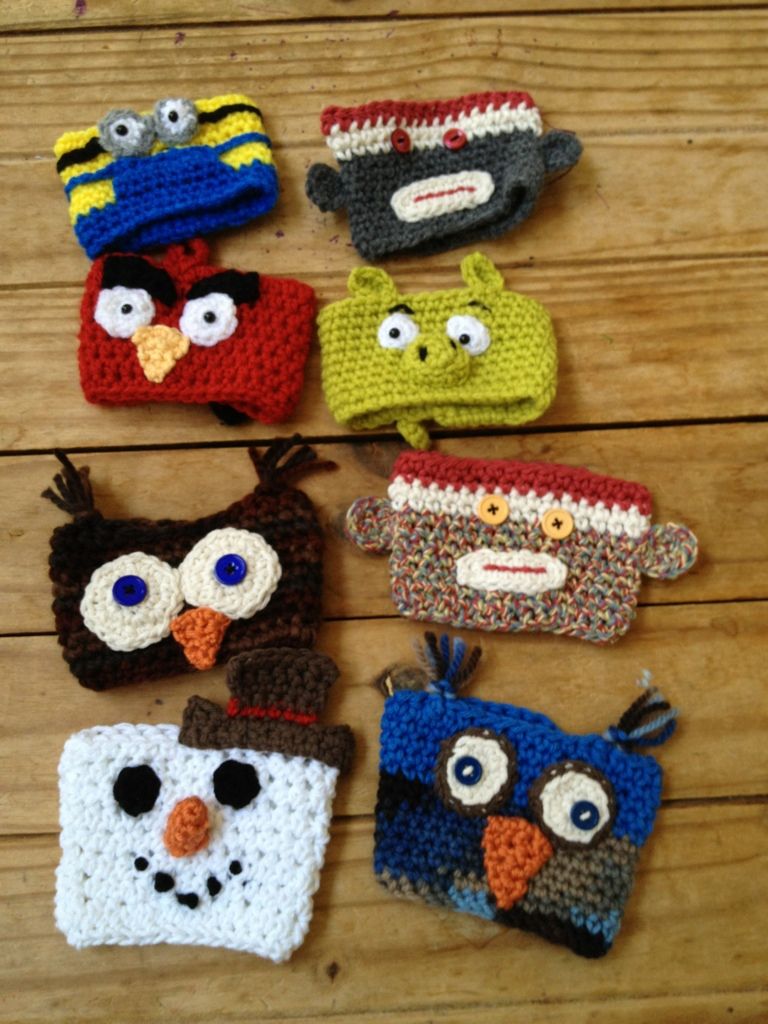
Next up, angry bird hats.  I made some last year with worsted weight, but I have a special affinity for the Loops & Thread Charisma yarn that I make my owl hats out of and bulky just works up so quickly, I had to try the AB hats in a new way.   I think it worked.

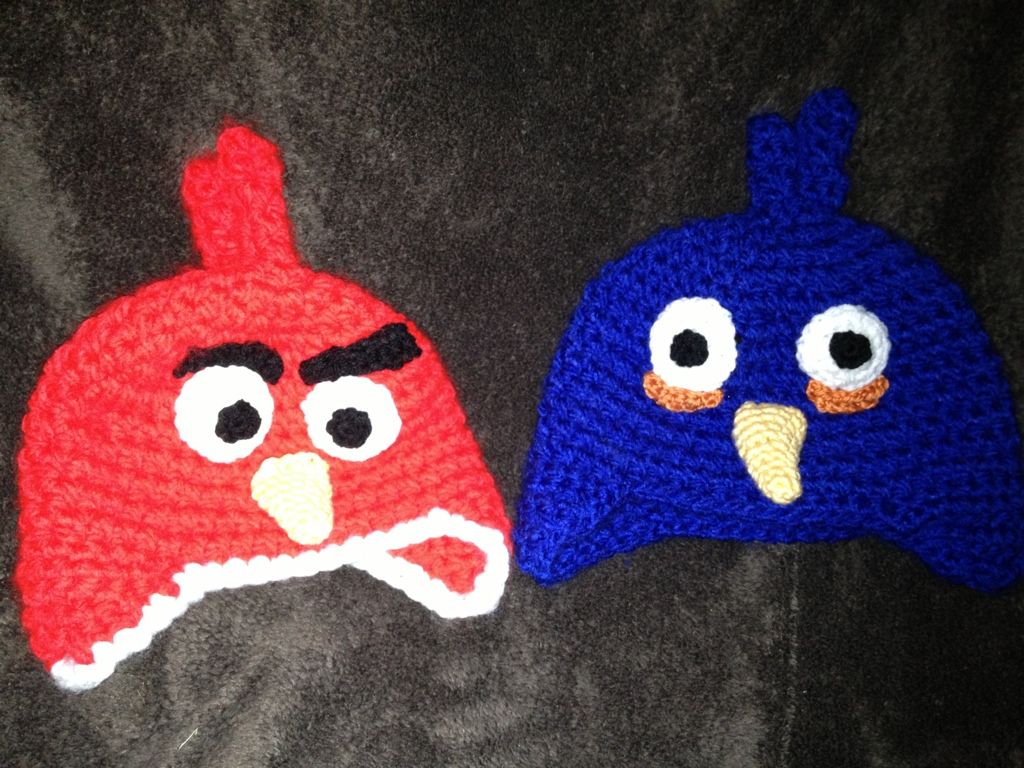
Worst picture quality ever.  Sorry.  If I waited for natural light, this post would never see the 1's and 0's it deserves.
Side view to see the tails and 3D beaks.   


And finally, this isnt an order, but I wanted to try my favorite owl hat pattern as a Hello Kitty Hat.   Cute, no? 

Sunday, September 9, 2012

You would think the second crocheted larynx would be easier

Yes, I have crocheted a larynx before.   For an extra credit project in my dysphagia class and boy howdy, does one get very intimate with the musculature and movement of the larynx when forced to piece it together in yarn.  Extra credit, well played, Prof!   

(Can you believe my little ol' blog is the first hit on a Google Search for Crocheted Larynx?)

But, having since moved onto owl hats and coffee cozies, I put crocheted anatomy behind me for good.  Or so I thought!

I am running in the MS MuckRuckus and offered a free coffee cozy to anyone who donates $10 or more to my team.   I also said that I would entertain custom orders for a donation of $20.  One of my classmates took the bait, donated $20 and asked for a larynx coffee cozy. 

"How hard could it be?" I thought, since I didn't have to do the musculature or the tendons like last time. I could just focus on the bone and cartilage and the trachea already screams "coffee cozy" to me.   AmIRight?

Well, 3 false starts later, I finally made some progress that seemed to work.   I was politely asked what I was working on while in the carpool lane at my daughter's preschool.  Sometimes, honesty is not the best policy..or at least the one that make you look sane. 


Late one night in bed, I had an epiphany as to how to keep the two side together, as well as how to incorporate the vocal folds - elastic hair ties, of course!   Otherwise the top heavy anterior side of the larynx might flop over and not fully protect the users hands from the hot coffee.   (It's all about functionality here at ADHD Crochet!).  


See how it holds the coffee cup snug, right there at the juncture of the thyroid and the cricoid cartilages?


And then...I realized that I made my tracheal rings go all the way around the trachea!   Ack!   A crocheted organ can be functional and aesthetically pleasing all day long, but if it isn't anatomically correct, it might as well be a lowly bag of yarn! 

Out came the scissors and a pointy needle.... 


And the front view...


Although I will probably recommend she stick with the Venti or the Trenta to accommodate that hyoid and epiglottis. 


For anyone else who wants to donate, I might nicely ask you to choose from my existing stock of much less cartilaginous cozies:


Saturday, September 1, 2012

It would have been easier to crochet a bike!

Yes, I'll tie this in somehow to my crochet blog, that is really an all purpose DIY/Crafty blog.    And this was hard enough work to be considered DIY!

My son, who has autism, gets these wild hairs about stuff (I need a snack that starts with K!  Remember my speech therapist from 2nd grade, can we meet her for lunch TODAY?  I need to ride a bike NOW!) and I usually try to accomodate those.  

But the bike thing is tricky.   He outgrew his bike with training wheels, I bought him a bigger bike and a pair of add on training wheels, but the axle wasnt big enough to attach them.   He isnt coordinated enough to steer, pedal and balance.   Hence the problem.

So I set out to create balance bikes for both him and my 4 & 6yr olds who also need to learn to ride on 2 wheels. 

And lo and behold, taking the pedal mechanism off a bike is not that easy!   So I figured I would blog it up and share the youtube videos that a friend shared with me and pay it forward, so that you, too can be drenched in sweat, grease and the satisfaction of makig your own balance bike out of a thrift store cast off, an awl and a hammer!

First up, removing the pedals...did you know the key is that the screws are threaded backwards?  Heh, yeah, that's kind of a key piece of info.


Next, how to remove the chain.   Yeah, who knew the chain was threaded through the solid part of the bike frame.  Well, not I, until I got to that point in the deconstruction process.


Not many things can make you feel invincible like solving a problem with an awl, a hammer and a bolt!   


And voila!  A pile of mangled bike parts to show for the better part of my Saturday!


And one happy little learner:


A happy big learner:


And one who is pretty much ready to move to pedals and no training wheels.  She's got this!


And I get to smell like grease all day!